How to Add Computer Vision to your Web App
Realtime Motion Capture in the Browser with Google MediaPipe

Author’s note: I realize Substack has mediocre styling not suited for reading code. If you’d like full-width code blocks with syntax highlighting, you can read this post on my Notion site.
As a web developer, do you feel like you’re completely out of the loop on how to implement AI into your applications? Does the idea of training a computer-vision model sound like magic? Fear not, I’ll show you how to add a sprinkle of AI magic to your applications without having to get a PhD in machine learning. We'll dive into Google's MediaPipe, a toolkit that makes adding AI features relatively straightforward.
We’ll get our hands dirty with a React demo, where I will walk you through real-time face and pose detection right in your browser. Hopefully you’ll feel motivated to try it out yourself!
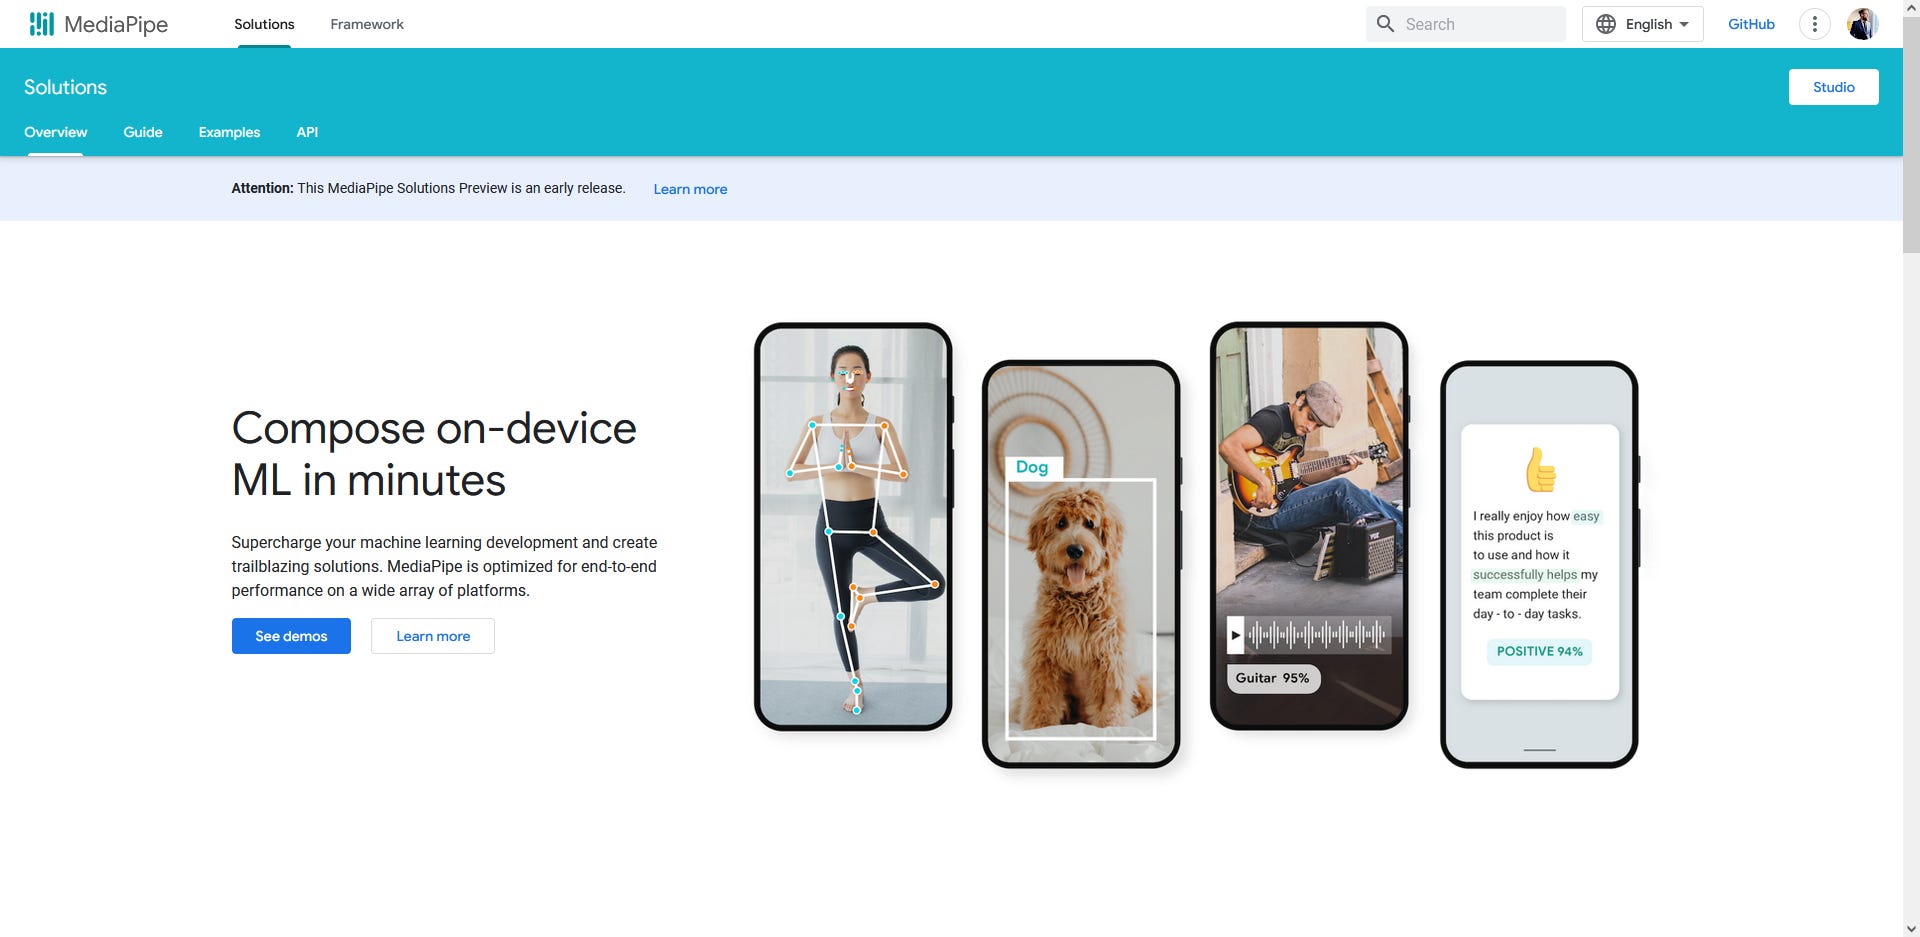
So, What's MediaPipe?
Google MediaPipe is an open-source toolbox that lets you build and deploy machine learning models to chew through all sorts of tasks. In this article we’ll focus on computer-vision related tasks (pose and face landmark detection), but you can actually use it for all sorts of other things as well (classification, gesture recognition, image generation, etc.). While MediaPipe is a vast playground for creating custom AI stuff, we're zoning in on MediaPipe Solutions for this series.
MediaPipe Solutions are like Lego sets that are pre-assembled. They're customizable models for common tasks—think detecting faces, tracking hands, estimating poses, and spotting objects. They package up the brain-hurting parts of machine learning, giving you a head start on integrating AI into your projects.
Why Should Web Developers Care?
Ease of Use: High-level APIs mean you don't need to be an AI guru to get started.
Performance: Designed for real-time use on the web and mobile, keeping things snappy. MediaPipe executes its web runtime via WebAssembly and WebGL, which translates to running some pretty heavy-duty machine learning models right in the browser, on the device.
Versatility: A toolbox full of models for various tasks, from analyzing facial features to understanding body movements.
Customizability: Pre-built doesn't mean set in stone. There's room to tweak models to fit your project's needs.
Getting Started
Prerequisites for the Reader
Clone the jwc-mediapipe repo and follow along. This repo comes with the full implementation, as well as a Storybook environment for easy testing/experimenting. If you would like to replicate it yourself, I tried to document the details of every config, and provide scripts for how the repo was initially set up.
Integrating @mediapipe/tasks-vision
First we need to integrate the MediaPipe npm package for pose and face landmark detection. As a bonus, it comes with pre-typed for TypeScript:
npm i @mediapipe/tasks-vision
MediaPipe in the browser works by loading several different files asynchronously. One thing we need is the WASM runtime for vision tasks. The official documentation recommends embedding a script tag to load the necessary bundle via a CDN. However, I’m always a bit wary about the reliability of CDNs.
Fortunately, this same bundle is included when installing the npm package, and just needs a bit of legwork to get the files in a place where it can be served with Storybook. I wound up using a bash script to put the relevant files into a public folder that can be served by Storybook.
#!/usr/bin/env bash

# This script is used to copy the wasm/js assets from @mediapipe/tasks-vision to the public folder.
# The documentation says to resolve them from a CDN, but I think it's better to have them locally.
# Fortunately, they're already in the package, so we just need to copy them to the public folder.

# Check if the @mediapipe/tasks-vision package is installed
if [ ! -d "node_modules/@mediapipe/tasks-vision" ]; then
	echo "Error: @mediapipe/tasks-vision not found. Run 'npm install' first."
	exit 1
fi

# Copy the wasm and js files to the public folder
echo "Copying @mediapipe/tasks-vision wasm and js files to public/mediapipe/"
mkdir -p public/mediapipe
cp node_modules/@mediapipe/tasks-vision/wasm/*.wasm public/mediapipe/
cp node_modules/@mediapipe/tasks-vision/wasm/*.js public/mediapipe/

echo "Done!"
Additionally, we’ll need to also acquire the files for the models themselves. In MediaPipe, there are bundles as .task files and can be found in the Models section of the Pose Landmark Detection and Face Landmark Detection documentation.
I actually recommend looking at those pages, as they include some implementation details of the models that are kind of interesting — as well as model cards that show the statistical performance of the different models!
As a bonus, you’ll also find this strangely uncanny image of a man’s face being tessellated:

Anyways, you can download those .task files and put them into public/assets manually, or you can do what I did and write another bash script that gets run when the repo is installed:
#!/usr/bin/env bash

# This script will download the .task files for MediaPipe tasks and save them to the public/assets folder.

mkdir -p public/assets

downloaded_files=0

# Function to download a task file if it doesn't exist
download_task_file() {
	local task_file_name=$1
	local task_file_url=$2

	if [ ! -f "public/assets/$task_file_name" ]; then
		echo "Downloading $task_file_name to public/assets/"
		curl -# -o "public/assets/$task_file_name" "$task_file_url"
		downloaded_files=$((downloaded_files+1))
	fi
}

# Download the .task files
download_task_file "pose_landmarker_lite.task" "<https://storage.googleapis.com/mediapipe-models/pose_landmarker/pose_landmarker_lite/float16/latest/pose_landmarker_lite.task>"
download_task_file "pose_landmarker_full.task" "<https://storage.googleapis.com/mediapipe-models/pose_landmarker/pose_landmarker_full/float16/latest/pose_landmarker_full.task>"
download_task_file "pose_landmarker_heavy.task" "<https://storage.googleapis.com/mediapipe-models/pose_landmarker/pose_landmarker_heavy/float16/latest/pose_landmarker_heavy.task>"
download_task_file "face_landmarker.task" "<https://storage.googleapis.com/mediapipe-models/face_landmarker/face_landmarker/float16/latest/face_landmarker.task>"

# Print done if files were downloaded
if [ $downloaded_files -gt 0 ]; then
	echo "Done."
fi
Creating an Abstraction Layer: MediaPipe.ts
Alright, now for the fun part. Let’s set up a light abstraction layer over the @mediapipe/tasks-vision package. I’ll be skipping over some of the implementation here, and focus on just the interesting parts.
Setting Up Useful Constants
I’m a bit averse to hard-coding strings everywhere, and there’s a handful of strings that MediaPipe takes in as arguments. So I first set up some useful constants for later:
import * as Vision from "@mediapipe/tasks-vision";

// ...

export const MEDIAPIPE = {
	/**
	 * The root path of the MediaPipe WASM files.
	 * This should map to the `public/mediapipe` directory in the project root,
	 * and is populated after running `npm install`.
	 */
	WASM_ROOT: "/mediapipe/",
	/** The paths to the MediaPipe task files. */
	POSE_LANDMARKER: {
		DEFAULT: "/assets/pose_landmarker_heavy.task",
		HEAVY: "/assets/pose_landmarker_heavy.task",
		LITE: "/assets/pose_landmarker_lite.task",
		FULL: "/assets/pose_landmarker_full.task",
	},
	FACE_LANDMARKER: {
		DEFAULT: "/assets/face_landmarker.task",
	},
	/** The running mode of the MediaPipe task. */
	RUNNING_MODE: {
		IMAGE: "IMAGE",
		VIDEO: "VIDEO",
	},
	/** The device to run the model on. */
	DELEGATE: {
		GPU: "GPU",
		CPU: "CPU",
	},
} as const;
Instantiating Vision.PoseLandmarker
The first thing we’re interested in using is the PoseLandmarker from @mediapipe/tasks-vision. The way you instantiate this thing requires passing in the location of the WASM files. Since we’ll be doing this demo in Storybook, it’ll be a path relative to the public folder — wherever we put our WASM bundle from earlier (in this case, /mediapipe/)
Here is an example:
const poseLandmarker = Vision.PoseLandmarker.createFromOptions(
	await Vision.FilesetResolver.forVisionTasks("/mediapipe/"),
	{
		runningMode: "VIDEO",
		numPoses: 1,
		outputSegmentationMasks: false,
		baseOptions: {
			modelAssetPath: "/assets/pose_landmarker_heavy.task",
			delegate: "GPU",
		},
	},
);
However, like I said, I’m not a fan of hard-coding all these strings and paths, since we might change them later. So let’s wrap this up into a function, and use the MEDIAPIPE object we declared earlier.
export type GetVideoLandmarkerOptions = {
	/**
	 * The device to run the model on. The "CPU" device is the slowest but most compatible,
	 * the "GPU" device is the fastest but requires a compatible GPU.
	 * @default "GPU"
	 */
	delegate?: (typeof MEDIAPIPE.DELEGATE)[keyof typeof MEDIAPIPE.DELEGATE];
	/**
	 * The type of the model to use. The "HEAVY" model is the most accurate but slowest,
	 * the "LITE" model is the fastest but least accurate, and the "FULL" model is in between.
	 * @default "HEAVY"
	 */
	modelType?: keyof typeof MEDIAPIPE.POSE_LANDMARKER;
};

export type GetVideoPoseLandmarkerOptions = GetVideoLandmarkerOptions;

/**
 * Get a PoseLandmarker instance for video processing.
 */
export async function getVideoPoseLandmarker(
	options: GetVideoPoseLandmarkerOptions = {
		delegate: MEDIAPIPE.DELEGATE.GPU,
		modelType: "HEAVY",
	},
) {
	const delegate = options.delegate || MEDIAPIPE.DELEGATE.GPU;
	const modelAssetPath =
		MEDIAPIPE.POSE_LANDMARKER[options.modelType || "HEAVY"];

	return Vision.PoseLandmarker.createFromOptions(
		await Vision.FilesetResolver.forVisionTasks(MEDIAPIPE.WASM_ROOT),
		{
			runningMode: MEDIAPIPE.RUNNING_MODE.VIDEO,
			numPoses: 1,
			outputSegmentationMasks: false, // TODO: Turn this back on when Mediapipe fixes segmentation masks
			baseOptions: {
				modelAssetPath,
				delegate,
			},
		},
	);
}
Instantiating Vision.FaceLandmarker
Setting up another method for Vision.FaceLandmarker is very similar. It just has slightly different options available for configuring tracking confidence, among other things.
export type GetVideoFaceLandmarkerOptions = GetVideoLandmarkerOptions;

/**
 * Get a FaceLandmarker instance for video processing.
 */
export async function getVideoFaceLandmarker(
	options: GetVideoFaceLandmarkerOptions = {
		delegate: MEDIAPIPE.DELEGATE.GPU,
	},
) {
	const delegate = options.delegate || MEDIAPIPE.DELEGATE.GPU;
	const modelAssetPath = MEDIAPIPE.FACE_LANDMARKER.DEFAULT;

	return Vision.FaceLandmarker.createFromOptions(
		await Vision.FilesetResolver.forVisionTasks(MEDIAPIPE.WASM_ROOT),
		{
			runningMode: MEDIAPIPE.RUNNING_MODE.VIDEO,
			numFaces: 1,
			baseOptions: {
				modelAssetPath,
				delegate,
			},
			minTrackingConfidence: 0.5,
			minFaceDetectionConfidence: 0.5,
			minFacePresenceConfidence: 0.5,
		},
	);
}
Creating a <Webcam> Component
Next, we’ll need a Webcam component. This component will worry about creating a <video> element on the page and using the MediaDevices API to prompt the user for access to their webcam.
We also need this Webcam component to offer a way to pass the video data up to its parent component (where we’ll actually do the inferencing and drawing of landmarks). Fortunately, <video> elements expose a loadeddata event that we can utilize to do this once the video data becomes available.
<Webcam> Props
Let’s first set up the props of our Webcam component to:
allow customization of the webcam feed (a.k.a. the media stream)
allow the parent to pass an
onLoadedDatamethod to bubble up information about the video stream to the parent.
import React, {useEffect, useRef} from "react";
import styles from "./Webcam.module.scss";

export type WebcamProps = {
	/**
	 * The media stream constraints to use when accessing the webcam.
	 * See <https://developer.mozilla.org/en-US/docs/Web/API/MediaDevices/getUserMedia#constraints>
	 */
	mediaStreamConstraints?: MediaStreamConstraints;
	/**
	 * The `loadeddata` event is fired when the first frame of the video has finished loading.
	 */
	onLoadedData?: (event: Event) => void;
};
Next, let’s implement the actual component. This might look a bit intimidating if you haven’t worked with videos/media-streams in React, but the comments should help you out here!
export const Webcam: React.FC<WebcamProps> = ({
	mediaStreamConstraints = {
		video: {
			facingMode: "user",
			width: {ideal: 1280},
			height: {ideal: 720},
			aspectRatio: {ideal: 16 / 9},
			frameRate: {ideal: 60},
		},
	},
	onLoadedData,
}) => {
	// The `useRef` hook creates a reference to a DOM element.
	// We'll use this reference to access the current video element once its available.
	const videoRef = useRef<HTMLVideoElement | null>(null);

	// `useEffect` is a hook that runs after the first render of the component.
	// The callback function passed to useEffect is called after the component is mounted.
	// The second argument to useEffect is an array of dependencies.
	// If any of the dependencies change, the callback is called again.
	const dependencies = [mediaStreamConstraints, onLoadedData];
	useEffect(() => {
		// First we define and immediately invoke an async function to get the media stream.
		// It's not awaited because `useEffect` can't be an async function.
		// Besides, we don't want to block the rendering of the component.
		(async function getMedia() {
			try {
				// The `navigator.mediaDevices.getUserMedia` method prompts the user for permission
				// to use a media input which produces a MediaStream with tracks containing
				// the requested type of media (in this case, we'd like video from the webcam)
				const mediaStream = await navigator.mediaDevices.getUserMedia({
					...mediaStreamConstraints,
				});

				if (videoRef.current) {
					// We can use the `srcObject` property of the video element to set the
					// media stream as the source, effectively displaying the video from the webcam.
					videoRef.current.srcObject = mediaStream;

					// Set the `onLoadedData` event listener if provided. This will allow the parent
					// component to respond to the `loadeddata` event and use the video element's properties.
					if (onLoadedData) {
						videoRef.current.addEventListener("loadeddata", onLoadedData);
					}
				}
			} catch (err) {
				console.error("An error occurred accessing the webcam:", err);
			}
		})();

		return () => {
			// The return value of the `useEffect` callback function is a cleanup function
			// that stops the media stream when the component is unmounted.
			if (videoRef.current && videoRef.current.srcObject) {
				// We need to remove the event listener to avoid memory leaks.
				if (onLoadedData) {
					videoRef.current.removeEventListener("loadeddata", onLoadedData);
				}

				// Stop all tracks on the media stream.
				(videoRef.current.srcObject as MediaStream)
					.getTracks()
					.forEach((track) => track.stop());
			}
		};
	}, dependencies);

	// Finally, let's render the video element, making sure to set the `ref` attribute
	// to the `videoRef` we created earlier. This will allow us to access the video element
	// in the `useEffect` callback function.
	return (
		<>
			<video ref={videoRef} className={styles.webcam} autoPlay playsInline />
		</>
	);
};
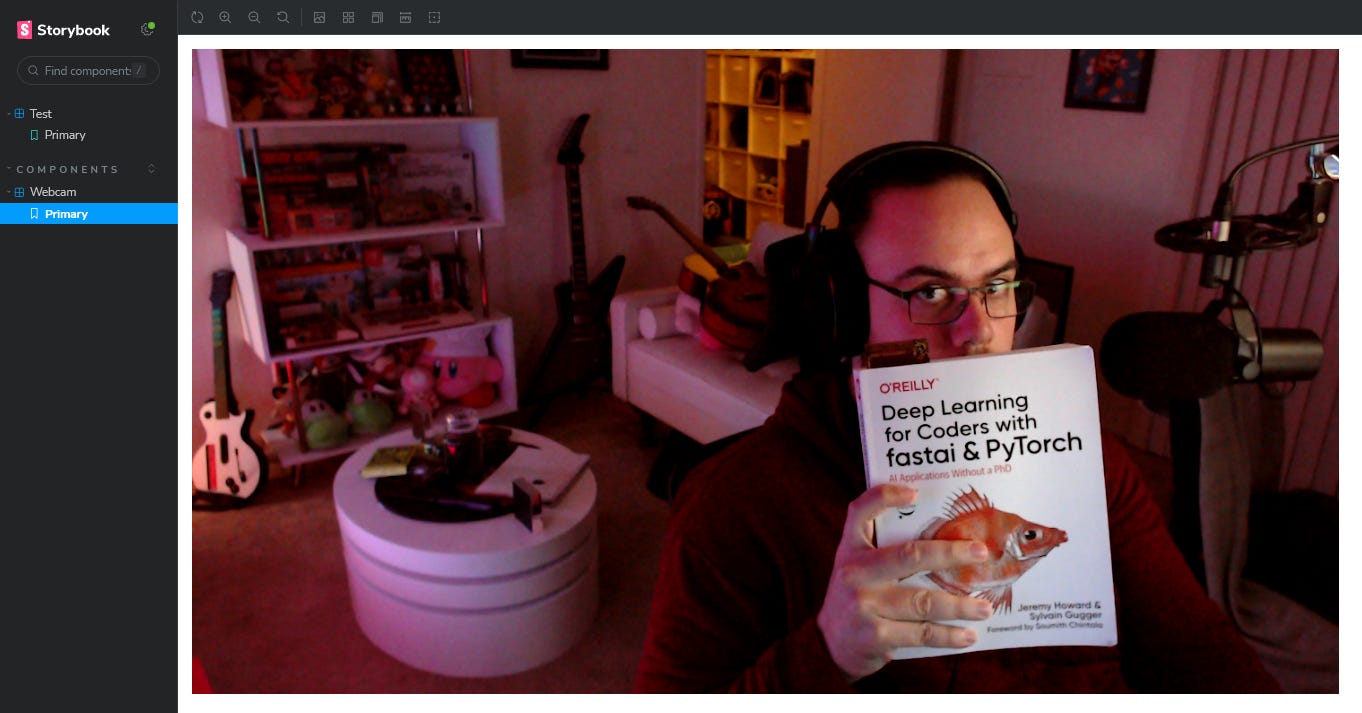
With that implemented, we should be able to try it out in Storybook and ensure that the Webcam component is working! So let’s write a quick Webcam.stories.tsx file:
import React from "react";
import type {Meta, StoryObj} from "@storybook/react";
import {Webcam} from "./Webcam.tsx";

const meta: Meta<typeof Webcam> = {
	component: Webcam,
};

export default meta;
type Story = StoryObj<typeof Webcam>;

/*
 *👇 Render functions are a framework specific feature to allow you control on how the component renders.
 * See <https://storybook.js.org/docs/api/csf>
 * to learn how to use render functions.
 */
export const Primary: Story = {
	render: () => (
		<Webcam
			onLoadedData={(e) => {
				console.log("Webcam loaded data:", e);
			}}
		/>
	),
};
And then check it out in Storybook:
npm run storybook
Creating a <WebcamLandmarked> Component
Now we get to the really interesting part! We now want to create a more powerful wrapper component that has the following responsibilities:
Receive the video stream from
<Webcam>via theonLoadedDataprop.Feed the video frames to a
PoseLandmarkerandFaceLandmarkerfor inference.Draw the landmarks onto a
<canvas>element that overlays the<video>element.
Drawing a <canvas>
First, we’ll need to set up the foundation of our component. We’ll need a <canvas> element, and make sure we’ll be able to draw on it using MediaPipe’s DrawingUtils class, which abstracts away a lot of the work when it comes to visualizing the landmarks.
Speaking of which, let’s make sure our MediaPipe.ts file actually exposes all the useful stuff we’ll need for this, including DrawingUtils.
export {
	PoseLandmarker,
	PoseLandmarkerResult,
	Landmark,
	NormalizedLandmark,
	FaceLandmarker,
	DrawingUtils,
} from "@mediapipe/tasks-vision";
Now that we’ve got that out of the way, let’s start implementing this <WebcamLandmarked> component:
import React, {useCallback, useEffect, useRef} from "react";
import {WebcamProps, Webcam} from "./Webcam.tsx";
import {DrawingUtils} from "@/lib/MediaPipe.ts";

// Import SCSS module
import styles from "./WebcamLandmarked.module.scss";

type WebcamLandmarked = WebcamProps;

export const WebcamLandmarked: React.FC<WebcamLandmarked> = ({
	mediaStreamConstraints,
}) => {
	const canvasRef = useRef<HTMLCanvasElement | null>(null);
	const drawingUtilsRef = useRef<DrawingUtils | null>(null);

	// We also need to create a reference to the canvas, and a Vision.DrawingUtils instance.
	useEffect(() => {
		if (canvasRef.current) {
			const canvasCtx = canvasRef.current.getContext("2d");
			if (canvasCtx) {
				drawingUtilsRef.current = new DrawingUtils(canvasCtx);
			}
		}
	}, []);

	// We'll render the webcam and canvas elements.
	return (
		<div className={styles.wrapper}>
			<Webcam mediaStreamConstraints={mediaStreamConstraints} />
			<canvas className={styles.canvas} ref={canvasRef} />
		</div>
	);
};
And here’s some styling to make the <canvas> element appear above the <video> element within <Webcam>. I’ve added a dashed outline to make this visible in Storybook.
.wrapper {
	display: flex;
	position: relative;
}

.canvas {
	position: absolute;
	top: 0;
	left: 0;
	outline: 3px dashed lime;
	pointer-events: none;
}
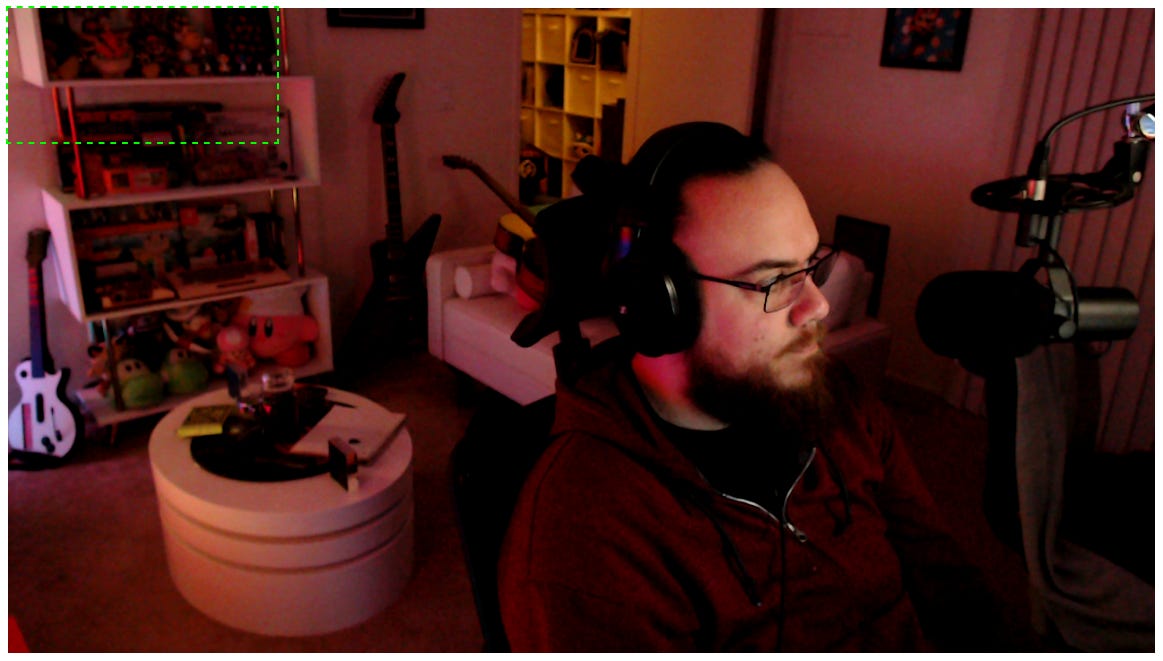
Ah, that doesn’t look quite right. We still need to adjust the size of the canvas once the video stream becomes available.
Let’s create an onLoadedDataCallback method using React’s useCallback hook. We’ll pass this to the child <Webcam> component’s onLoadedData prop. Within this callback, we’ll make sure to store a reference to the <video> element, as well as resize our <canvas> to match the size of the video.
// ...

// Use this to store the video element once it's available.
const videoRef = useRef<HTMLVideoElement | null>(null);

// We'll use the `onLoadedData` callback to start the processVideoFrame loop.
const processVideoFrame = useCallback(() => {
	// TODO: This is where we'll process the video frames.
}, []);

const onLoadedDataCallback = useCallback(
	async function prepareLoadedData(event: Event) {
		// Store the video element in the `videoRef` so that we can access it later.
		const video = event.target as HTMLVideoElement;
		videoRef.current = video;

		// Resize the canvas
		const canvas = canvasRef.current;
		if (canvas) {
			canvas.width = video.videoWidth;
			canvas.height = video.videoHeight;
		}

		if (onLoadedData) {
			onLoadedData(event);
		}

		console.info("WebcamLandmarked: Starting processVideoFrame loop!");
		processVideoFrame();
	},
	[onLoadedData, processVideoFrame],
);

// We'll render the webcam and canvas elements.
return (
	<div className={styles.wrapper}>
		<Webcam
			mediaStreamConstraints={mediaStreamConstraints}
			onLoadedData={onLoadedDataCallback}
		/>
		<canvas className={styles.canvas} ref={canvasRef} />
	</div>
);

// ...
There we go! Now the <canvas> element (for which the outline color I’ve changed from red to blue) is matching the size of the video, which means it’s primed and ready to be drawn on!
Adding PoseLandmarker and FaceLandmarker
Now that we have a reference to our canvas and our video, let’s also instantiate and store a reference to a Vision.PoseLandmarker and a Vision.FaceLandmarker from @mediapipe/tasks-vision package. Rather than using the package directly, we’ll use the methods we defined in MediaPipe.ts earlier. So first, we’ll add them to our imports:
import {
	getVideoPoseLandmarker,
	getVideoFaceLandmarker,
	PoseLandmarker,
	FaceLandmarker,
	DrawingUtils,
	MEDIAPIPE,
} from "@/lib/MediaPipe.ts";
Now let’s instantiate them in our component:
// ...

// This is how we'll instantiate our MediaPipe PoseLandmarker and FaceLandmarker.
// We'll save them in refs so that we can access them in the `processVideoFrame` function
// once they're available.
const poseLandmarkerRef = useRef<PoseLandmarker | null>(null);
const faceLandmarkerRef = useRef<FaceLandmarker | null>(null);
useEffect(() => {
	(async function initPoseLandmarker() {
		poseLandmarkerRef.current = await getVideoPoseLandmarker({
			delegate: MEDIAPIPE.DELEGATE.GPU,
		});
		faceLandmarkerRef.current = await getVideoFaceLandmarker({
			delegate: MEDIAPIPE.DELEGATE.GPU,
		});
	})();
}, []);

// ...
Since we’ve been jumping around a bit, here is our WebcamLandmarked component so far:
import React, {useCallback, useEffect, useRef} from "react";
import {WebcamProps, Webcam} from "./Webcam.tsx";
import {
	getVideoPoseLandmarker,
	getVideoFaceLandmarker,
	PoseLandmarker,
	FaceLandmarker,
	DrawingUtils,
	MEDIAPIPE,
} from "@/lib/MediaPipe.ts";

// Import SCSS module
import styles from "./WebcamLandmarked.module.scss";

type WebcamLandmarked = WebcamProps;

export const WebcamLandmarked: React.FC<WebcamLandmarked> = ({
	mediaStreamConstraints,
	onLoadedData,
}) => {
	const canvasRef = useRef<HTMLCanvasElement | null>(null);
	const videoRef = useRef<HTMLVideoElement | null>(null);
	const poseLandmarkerRef = useRef<PoseLandmarker | null>(null);
	const faceLandmarkerRef = useRef<FaceLandmarker | null>(null);
	const drawingUtilsRef = useRef<DrawingUtils | null>(null);

	useEffect(() => {
		(async function initPoseLandmarker() {
			poseLandmarkerRef.current = await getVideoPoseLandmarker({
				delegate: MEDIAPIPE.DELEGATE.GPU,
			});
			faceLandmarkerRef.current = await getVideoFaceLandmarker({
				delegate: MEDIAPIPE.DELEGATE.GPU,
			});
		})();
	}, []);

	useEffect(() => {
		if (canvasRef.current) {
			const canvasCtx = canvasRef.current.getContext("2d");
			if (canvasCtx) {
				drawingUtilsRef.current = new DrawingUtils(canvasCtx);
			}
		}
	}, []);

	const processVideoFrame = useCallback(() => {
		// TODO: This is where we'll process the video frames.
	}, []);

	const onLoadedDataCallback = useCallback(
		async function prepareLoadedData(event: Event) {
			const video = event.target as HTMLVideoElement;
			videoRef.current = video;

			const canvas = canvasRef.current;
			if (canvas) {
				canvas.width = video.videoWidth;
				canvas.height = video.videoHeight;
			}

			if (onLoadedData) {
				onLoadedData(event);
			}

			console.info("WebcamLandmarked: Starting processVideoFrame loop!");
			processVideoFrame();
		},
		[onLoadedData, processVideoFrame],
	);

	return (
		<div className={styles.wrapper}>
			<Webcam
				mediaStreamConstraints={mediaStreamConstraints}
				onLoadedData={onLoadedDataCallback}
			/>
			<canvas className={styles.canvas} ref={canvasRef} />
		</div>
	);
};
Creating the processVideoFrame Loop with requestAnimationFrame
We’ve successfully set up our canvas, as well as instantiated our landmarkers. Now all we have to do is set up our animation loop so that we can feed the video data to the landmarkers for inference. We’ll perform the inference every time there’s a new video frame. In order to do this, we’ll set up the inferencing logic in processVideoFrame. We’ll utilize the requestAnimationFrame method in order to schedule this processing every animation frame in the browser.
One caveat is that the rendering rate of the browser may be much faster than that of the webcam (especially on high-refresh-rate displays, such as those belonging to Macs/iOS devices). So we’ll need to observe the current frame of the video, and make sure it’s actually changed before doing the processing. Fortunately, we can do this using the .currentTime property of our <video> element (stored in videoRef).
That all said, let’s update our processVideoFrame callback to implement all this.
// This is where we'll process the video frames.
const lastVideoTimeRef = useRef<number>(0);
const processVideoFrame = useCallback(() => {
	requestAnimationFrame(processVideoFrame);

	const video = videoRef.current;
	const canvas = canvasRef.current;
	const poseLandmarker = poseLandmarkerRef.current;
	const faceLandmarker = faceLandmarkerRef.current;
	const drawingUtils = drawingUtilsRef.current;
	if (!video || !canvas || !poseLandmarker || !faceLandmarker || !drawingUtils) {
		return;
	}

	// Check if the video time has changed, and update accordingly if so.
	if (video.currentTime === lastVideoTimeRef.current) {
		return;
	}
	lastVideoTimeRef.current = video.currentTime;

	// Get the canvas context.
	const canvasCtx = canvas.getContext("2d");
	if (!canvasCtx) {
		return;
	}

	// Clear the canvas.
	canvasCtx.save();
	canvasCtx.clearRect(0, 0, canvasCtx.canvas.width, canvasCtx.canvas.height);
	canvasCtx.restore();

	// TODO: Inference on video frame
}, []);
Performing the Pose Landmark Detection
Great, now as far as doing the actual inference, it’s actually pretty straightforward! We’ll use our poseLandmarker's detectForVideo method. This method requires that we pass it:
a reference to our
<video>elementthe current time of the video stream in milliseconds
and a callback method to process the landmarker result with
After we’ve cleared the canvas, we’ll add the following code:
// Run the pose landmark detection
poseLandmarker.detectForVideo(
	video,
	video.currentTime * 1000, // Convert to milliseconds
	(poseLandmarkerResult) => {
		canvasCtx.save();

		const poseLandmarks = poseLandmarkerResult.landmarks;

		// Draw each landmark, and its connectors.
		for (const landmark of poseLandmarks) {
			drawingUtils.drawLandmarks(landmark, {
				radius: (data) => {
					// This is just a nice way to visualize the "depth" of a marker,
					// by adjusting its radius. Don't worry too much about this.
					return DrawingUtils.lerp(data.from?.z || 0, -0.15, 0.1, 5, 1);
				},
				color: "#FFFFFF80",
				lineWidth: 2,
			});
			drawingUtils.drawConnectors(
				landmark,
				PoseLandmarker.POSE_CONNECTIONS,
				{color: "#FFFFFF80", lineWidth: 2},
			);
		}

		canvasCtx.restore();
	},
);
Now, in Storybook, we should already be able to see the fruits of our labor!

Performing the Face Landmark Detection
The face landmark detection is a bit easier to do. The inference is much faster, so it doesn’t need to run asynchronously. We can just call faceLandmarker.detectForVideo and get the results immediately. We’ll add the following snippet directly after our pose landmark detection code:
const faceLandmarkerResult = faceLandmarker.detectForVideo(
	video,
	video.currentTime * 1000, // Convert to milliseconds
);

canvasCtx.save();

if (faceLandmarkerResult.faceLandmarks.length) {
	const {faceLandmarks} = faceLandmarkerResult;

	// Okay, maybe drawing all the face landmarks is more of a doozy...
	// I recommend just copy-pasting this.
	for (const landmark of faceLandmarks) {
		drawingUtils.drawConnectors(
			landmark,
			FaceLandmarker.FACE_LANDMARKS_RIGHT_EYE,
			{color: "#FF3030", lineWidth: 2},
		);
		drawingUtils.drawConnectors(
			landmark,
			FaceLandmarker.FACE_LANDMARKS_RIGHT_EYEBROW,
			{color: "#FF3030", lineWidth: 2},
		);
		drawingUtils.drawConnectors(
			landmark,
			FaceLandmarker.FACE_LANDMARKS_LEFT_EYE,
			{color: "#30FF30", lineWidth: 2},
		);
		drawingUtils.drawConnectors(
			landmark,
			FaceLandmarker.FACE_LANDMARKS_LEFT_EYEBROW,
			{color: "#30FF30", lineWidth: 2},
		);
		drawingUtils.drawConnectors(
			landmark,
			FaceLandmarker.FACE_LANDMARKS_FACE_OVAL,
			{color: "#E0E0E0", lineWidth: 2},
		);
		drawingUtils.drawConnectors(
			landmark,
			FaceLandmarker.FACE_LANDMARKS_LIPS,
			{color: "#E0E0E0", lineWidth: 2},
		);
		drawingUtils.drawConnectors(
			landmark,
			FaceLandmarker.FACE_LANDMARKS_RIGHT_IRIS,
			{color: "#FF3030", lineWidth: 2},
		);
		drawingUtils.drawConnectors(
			landmark,
			FaceLandmarker.FACE_LANDMARKS_LEFT_IRIS,
			{color: "#30FF30", lineWidth: 2},
		);
	}
}

canvasCtx.restore();
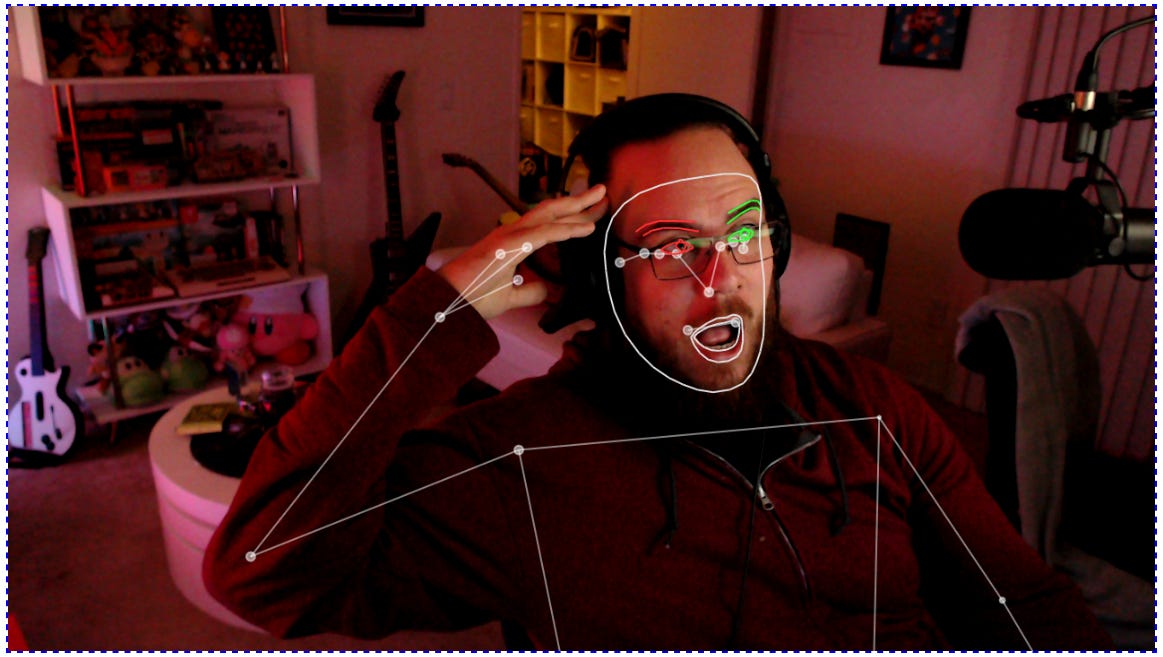
And once again, we can pop open Storybook to see all of our effort pay off! Now, you too, can be an uncanny wire-frame person!
The “Final” <WebcamLandmarked> Component
Now all that’s left to do is a little bit of refactoring. We want to make sure that we can handle de-scheduling our requestAnimationFrame callback when the component is unmounted. We could also maybe optimize how we are checking all of our references at the beginning of processVideoFrame.
With those modifications, here is our “final” component:
import React, {useCallback, useEffect, useRef} from "react";
import {WebcamProps, Webcam} from "./Webcam.tsx";
import {
	getVideoPoseLandmarker,
	getVideoFaceLandmarker,
	PoseLandmarker,
	FaceLandmarker,
	DrawingUtils,
	MEDIAPIPE,
} from "@/lib/MediaPipe.ts";

// Import SCSS module
import styles from "./WebcamLandmarked.module.scss";

type WebcamLandmarked = WebcamProps;

export const WebcamLandmarked: React.FC<WebcamLandmarked> = ({
	mediaStreamConstraints,
	onLoadedData,
}) => {
	const canvasRef = useRef<HTMLCanvasElement | null>(null);
	const videoRef = useRef<HTMLVideoElement | null>(null);
	const requestAnimationFrameId = useRef<number | null>(null);
	const lastVideoTimeRef = useRef<number>(0);
	const poseLandmarkerRef = useRef<PoseLandmarker | null>(null);
	const faceLandmarkerRef = useRef<FaceLandmarker | null>(null);
	const drawingUtilsRef = useRef<DrawingUtils | null>(null);

	const animationRefs = [
		videoRef,
		canvasRef,
		poseLandmarkerRef,
		faceLandmarkerRef,
		drawingUtilsRef,
	];

	useEffect(() => {
		(async function initPoseLandmarker() {
			poseLandmarkerRef.current = await getVideoPoseLandmarker({
				delegate: MEDIAPIPE.DELEGATE.GPU,
			});
			faceLandmarkerRef.current = await getVideoFaceLandmarker({
				delegate: MEDIAPIPE.DELEGATE.GPU,
			});
		})();
	}, []);

	useEffect(() => {
		if (canvasRef.current) {
			const canvasCtx = canvasRef.current.getContext("2d");
			if (canvasCtx) {
				drawingUtilsRef.current = new DrawingUtils(canvasCtx);
			}
		}
	}, []);

	useEffect(() => {
		return () => {
			if (requestAnimationFrameId.current) {
				cancelAnimationFrame(requestAnimationFrameId.current);
			}
		};
	}, []);

	const processVideoFrame = useCallback(() => {
		requestAnimationFrameId.current = requestAnimationFrame(processVideoFrame);

		for (const ref of animationRefs) {
			if (!ref.current) {
				return;
			}
		}

		const video = videoRef.current!;
		const canvas = canvasRef.current!;
		const poseLandmarker = poseLandmarkerRef.current!;
		const faceLandmarker = faceLandmarkerRef.current!;
		const drawingUtils = drawingUtilsRef.current!;

		if (video.currentTime === lastVideoTimeRef.current) {
			return;
		}

		lastVideoTimeRef.current = video.currentTime;

		const canvasCtx = canvas.getContext("2d");
		if (!canvasCtx) {
			return;
		}

		canvasCtx.save();
		canvasCtx.clearRect(0, 0, canvasCtx.canvas.width, canvasCtx.canvas.height);
		canvasCtx.restore();

		poseLandmarker.detectForVideo(
			video,
			video.currentTime * 1000,
			(poseLandmarkerResult) => {
				canvasCtx.save();

				const poseLandmarks = poseLandmarkerResult.landmarks;

				for (const landmark of poseLandmarks) {
					drawingUtils.drawLandmarks(landmark, {
						radius: (data) =>
							DrawingUtils.lerp(data.from?.z || 0, -0.15, 0.1, 5, 1),
						color: "#FFFFFF80",
						lineWidth: 2,
					});
					drawingUtils.drawConnectors(
						landmark,
						PoseLandmarker.POSE_CONNECTIONS,
						{color: "#FFFFFF80", lineWidth: 2},
					);
				}

				canvasCtx.restore();
			},
		);

		const faceLandmarkerResult = faceLandmarker.detectForVideo(
			video,
			video.currentTime * 1000,
		);

		canvasCtx.save();

		if (faceLandmarkerResult.faceLandmarks.length) {
			const {faceLandmarks} = faceLandmarkerResult;

			for (const landmark of faceLandmarks) {
				drawingUtils.drawConnectors(
					landmark,
					FaceLandmarker.FACE_LANDMARKS_RIGHT_EYE,
					{color: "#FF3030", lineWidth: 2},
				);
				drawingUtils.drawConnectors(
					landmark,
					FaceLandmarker.FACE_LANDMARKS_RIGHT_EYEBROW,
					{color: "#FF3030", lineWidth: 2},
				);
				drawingUtils.drawConnectors(
					landmark,
					FaceLandmarker.FACE_LANDMARKS_LEFT_EYE,
					{color: "#30FF30", lineWidth: 2},
				);
				drawingUtils.drawConnectors(
					landmark,
					FaceLandmarker.FACE_LANDMARKS_LEFT_EYEBROW,
					{color: "#30FF30", lineWidth: 2},
				);
				drawingUtils.drawConnectors(
					landmark,
					FaceLandmarker.FACE_LANDMARKS_FACE_OVAL,
					{color: "#E0E0E0", lineWidth: 2},
				);
				drawingUtils.drawConnectors(
					landmark,
					FaceLandmarker.FACE_LANDMARKS_LIPS,
					{color: "#E0E0E0", lineWidth: 2},
				);
				drawingUtils.drawConnectors(
					landmark,
					FaceLandmarker.FACE_LANDMARKS_RIGHT_IRIS,
					{color: "#FF3030", lineWidth: 2},
				);
				drawingUtils.drawConnectors(
					landmark,
					FaceLandmarker.FACE_LANDMARKS_LEFT_IRIS,
					{color: "#30FF30", lineWidth: 2},
				);
			}
		}

		canvasCtx.restore();
	}, []);

	const onLoadedDataCallback = useCallback(
		async function prepareLoadedData(event: Event) {
			const video = event.target as HTMLVideoElement;
			videoRef.current = video;

			const canvas = canvasRef.current;
			if (canvas) {
				canvas.width = video.videoWidth;
				canvas.height = video.videoHeight;
			}

			if (onLoadedData) {
				onLoadedData(event);
			}

			console.info("WebcamLandmarked: Starting processVideoFrame loop!");
			processVideoFrame();
		},
		[onLoadedData, processVideoFrame],
	);

	return (
		<div className={styles.wrapper}>
			<Webcam
				mediaStreamConstraints={mediaStreamConstraints}
				onLoadedData={onLoadedDataCallback}
			/>
			<canvas className={styles.canvas} ref={canvasRef} />
		</div>
	);
};
Other Things to Explore…
Smoothing out Motion Jitter
The reason I am calling this “final” in quotes, is because there’s a lot more you can do from here. For example, I found the output of the landmarkers to be quite jittery and in need of some additional post-processing to get them look nice and smooth.
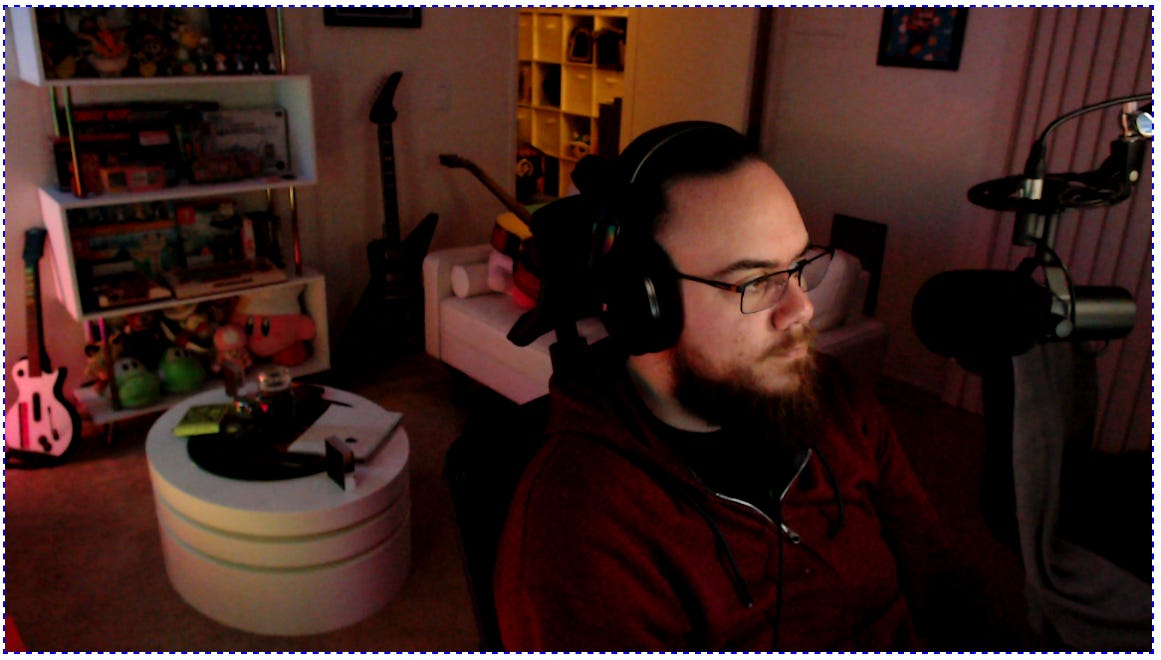
For example, here is a clip of the jitter, as well as the inaccuracy of the model when the subject is poorly lit, wearing dark clothing, and against a dark background (in this case, my chair).
In the full jwc-mediapipe repo, I went a step further and added the option to pass a smoothing function as a prop to <WebcamLandmarked> and implemented two smoothing methods: an exponentially weighted moving average, and a Kalman filter. You can find the implementation of each in MediaPipe.ts and KalmanFilter.ts respectively.
I personally found the Kalman filter method to be particularly effective at reducing motion jitter, with the trade-off of some latency:
Other MediaPipe Tasks
MediaPipe Solutions offers a much wider variety of possible tasks than what we explored in this demo. It’s definitely worth taking a look and imagining what kind of cool things you could prototype or build using just the out-of-the-box models alone.
So far, it looks like they have pre-trained models for:
object and face detection
image classification, segmentation, embedding, and generation
face, pose, and hand landmark detection
gesture recognition
face stylization
text classification and embedding
language detection
and audio classification
There also seems to be a holistic landmark detection task that combines the face/pose/hand models, but it doesn’t yet seem to be available in the latest MediaPipe implementation.
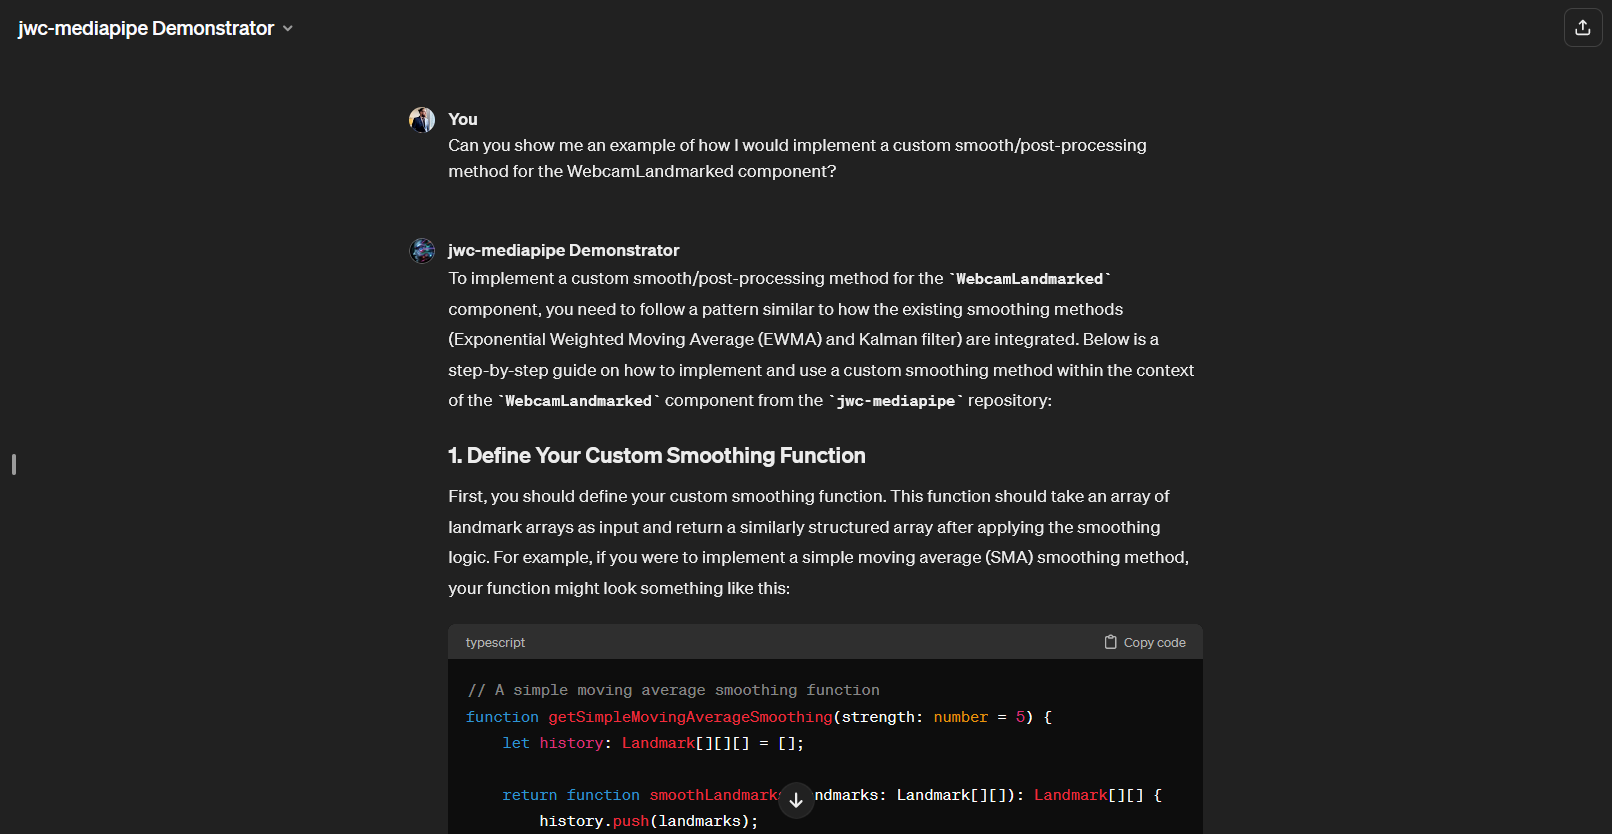
Custom GPT
As an experiment, I fed all of the code in this repo to a custom GPT so that you can ask it about implementation details! Feel free to try it out if you have ChatGPT Plus!